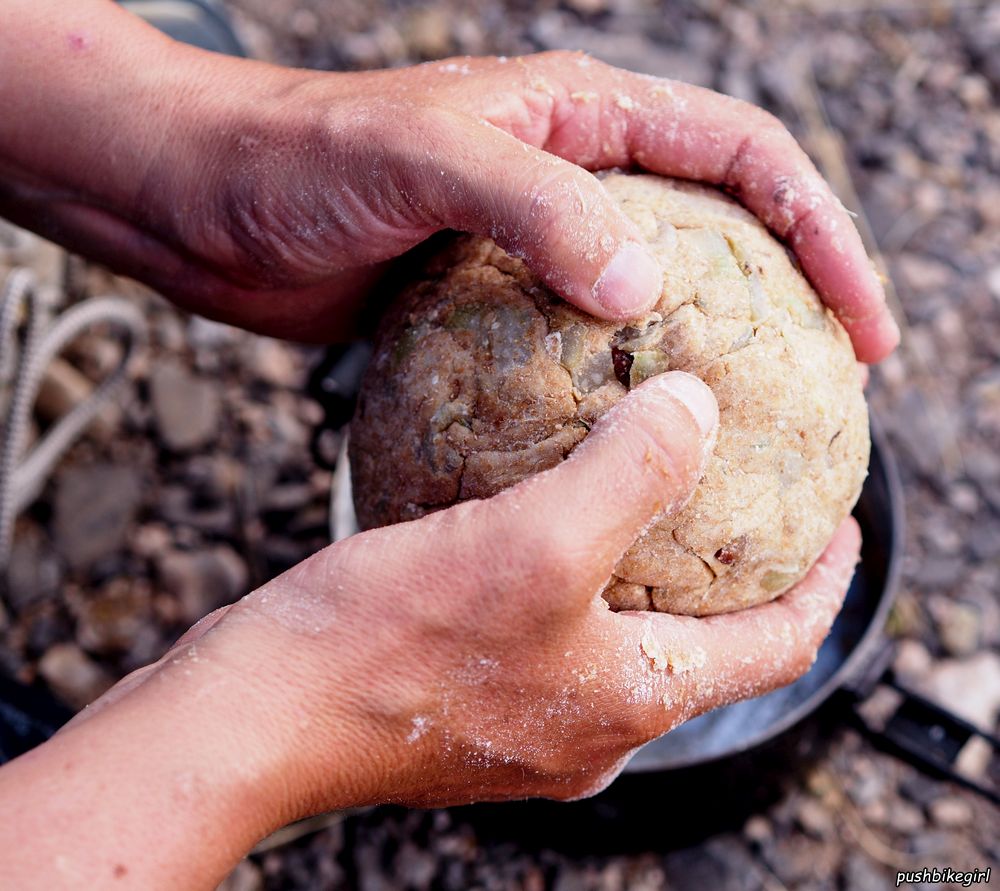
Baking bread on the fire an easy way

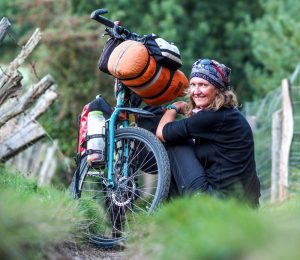
I started baking bread on the fire after Cycling Cindy inspired me in my “Meals on two wheels Interview” where she explains how she bakes bread.
I used to think that baking bread is way too complicated and time-consuming, but it is not at all. Additionally, it is a lot of fun and really tasty!


I have carried out various experiments and obtained the best results using the following procedure.
What you need:
- Fire with a lot of embers
- Flour (I use whole wheat flour)
- dry yeast
- Water
- A bit of salt
- Some sugar
- 1 spoon (it also works without)
- 2 fire-resistant pots (I use two MSR steel pots 0.8L and 1.5L)
- 4 flat small stones
- 1 cup – it also works without – then you simply use the large pot for it
- Gloves (for protection against the heat of the fire – you can also use a towel and wrap it around your hand and the pot handle)
- Any ingredients such as nuts, sunflower seeds, oats, dried fruits like dates and raisins or baked onions and bacon – whatever you like best

Because having neither measuring cups nor a scale in my panniers, I am not all that fuzzy with the amount of ingredients and so far, each bread tasted great and improvisation works very well here.
1. As the first thing you start a fire. You need good embers – the fire must be really hot.
2. Heat up about 200 ml of water to around 45 degrees.
3. Mix approximately 1 tablespoon of dry yeast with about a teaspoon of sugar and stir with about 100ml of the heated water in your cup and set aside covered with a pot lid for approximately 15 minutes. Place the pot with the remaining water close to the fire so that the water remains warm. If you are using larger pots to process a larger amount of flour, adjust the yeast and water amount accordingly.
4. Use the time and continue to take care of the fire. The more embers the better.

5. Fill your small pot about ¾ of the way with flour. I use whole wheat flour, which tends to rise less than white or processed flours, but the bread is healthier and still tastes great. Ingredients which you like best are immediately mixed with the flour. Anything – just find out which combination you like.

6. After about 15 minutes, stir the contents of the cup with some salt into the flour and mix thoroughly with the spoon and gradually add some water until you have kneaded a supple dough. After a while, it will be better if you use your hands. If it is too sticky, simply add some flour – or even more water if it is too dry.
7. Cover the dough with the pot lid and place it close to the fire so it stays warm but not too hot. Let the dough rise 30 minutes.
8. Your fire should have enough embers by now.


9. Insert the 4 flat tiny stones into the large pot, fill the pot with water so that the stones are well covered. Place the small pot with the dough on the stones in the big pot after approximately 30min of rising time. (I need to disconnect the handle of my small pot to get it fit into the big pot). Take the lid off the small pot and use only the lid of the large pot and now put it on the embers.
10. Cover the lid well with embers to get a nice crispy crust. (Important)

11. After 30 min check if there is still water in the pot, if needed fill it to cover the stones again. See if the bread might even ready by then. Knock on the bread, if it sounds hollow, then it is baked. You can also put a knife into the dough, if it goes easily in and out again and nothing sticks to the blade it is done.
If you have a bigger pot the baking time is certainly longer.

Do you have any questions or bread baking ideas to contribute please leave a comment.
Enjoy.

You might be also interested in:


Thanks for posting – very helpful
Wow! Looks really yummy. I think I’ll give that a try soon. Thank you Pushbikegirl <3
Bob – thanks – let me know how it worked out please……enjoy, Heike
Well done Heike, that bread looks delicious. Baking bread in a kitchen is hard enough but you are a magician,
best wishes
Mike.
🙂 It is really easy – believe me……thanks for your great compliment – enjoy life, Heike
Excellent! Thanks for posting 🙂
Hey Heike, thanks for the info, looking forward to trying this…..Got to buy another pot first !
Safe travels A.B
Hi Arthur, I received an email in a forum and this info might interest you. This person is simply covering the pot bottom with small stones and simply makes sure that the dough is not touching the inside of the pot. Worth a try I guess.
Cheers Heike
Hi Arthur,
I tried the one pot version and wasn’t very successful ……
Cheers Heike
Wertvolle Inspiration für mich, denn bislang habe ich mich verweigert-gescheut-nicht getraut, den aufwändigen Back-Prozess zuhause im elektrischen Backofen nach draußen und unterwegs zu transputieren.
Gestern erst einmal zuhause getestet und in mehreren Phasen probiert: zum Vergleich 2 Brote mit selbst gemahlenen Roggen-Dinkel & Walnüssen, das Eine wie üblich in offener Form gebacken das Andere im Doppeltopf im Dampfbad ge,gart.
= gleich lange Garzeit mit 40 Min. = das Eine knusprig, das Andere fluffig = unverschämt lecker, beinahe süchtig machend.
Anstelle von Backhefe: Grund-Sauer-Teig, Grund-Hefe-Teig, die ich vom vorherigen Brot-Ansatz abnehme und aufbewahre. Nachteil: die Gärung (Dinkel), das Fermentieren (Roggen) mag 1 Nacht warm gehalten werden, um aufzugehen. Diese Köstlichkeit bekomme ich ansonsten nirgends!
Prima Kojote, das freut mich……
LG Heike
Thank You Heike! This is great 🙂 I just baked a bread with a trangia burner and the same idea – however I did not use water in the bottom of the big pot that takes the flame. I wonder the reason behind using water and if this is necessary when baking on embers?
On the alcohol burner all went well without the water in the bottom.
For general interest, I didn’t have my smaller MSR pot with me so I put the bread on an aluminum grilling tray folded to the appropriate size to fit the 1.5l MSR pot – but great to see in your post that the two MSRs can be nested together for baking – thanks again!!
Hi Paulina,
not sure how you are baking the bread on a Trangia. How long does it take? You must need a lot of alcohol – right?
The water is needed so the bottom of the bread doesn’t burn. It is too hot otherwise.
Your idea using a grilling tray is great – this way you are avoiding that the dough touches the metal – so less likely to get burned. Thanks 🙂
Happy baking time 🙂
Cheers Heike
Hi Heike!
Yes, baking the bread takes approx 40 mins – 1 hr depending on how much dough you have and how thick/wide the bread is laid out in the “oven” tray. If the burner is on minimum flame, it takes about 1 burnerful or a bit more – depending on wind &other circumstances.
Trangia method is more expensive but good if there is active wildfire warning or other reason reason why baking on fire&embers would not be appropriate.
I realised your point about black bottomed bread today when I baked on embers – it only took about 15mins with as opposed to 45mins on Trangia with the same amount of dough, and the bottom was already a bit black! Embers are WAY hotter than Trangia on lowest setting 🙂
Hi Pauline – great thanks for the information. Sounds like not too expensive and also convenient.
Yes embers are super hot. But it gets crispy at the top if you put embers on the top of the lid.
How is the result with the trangia? Is there a crust?
Thanks for sharing your way of baking !
Cheers Heike
Hi Heike!
With Trangia there is a “wood oven bake” feel crust in the bottom (I didn’t use any water, just some metal screw nuts to lift the baking tray from the bottom of the MSR pot), but the top is soft like any store bought bread in a bag. It rings hollow when tapped from the top though.
However, I turned my second trangia loaf upside down for the last 5-10 minutes or so, which made it also more crusty from the top 🙂
Hi Paulina – sounds like a great bread – well done ! Keep having fun!
Thanks again!
Cheers Heike
My Trangia burner was nested in a home made flat-pack tripod/pot holder with an Alpkit Concertina windshield. Were I to bake using the real Trangia setup where the burner sits inside its official nesting, I can imagine fuel consumption could be lower. I did use over one burner full too in a batch, so it seems to depend on a variety of variables.
My bread was baked with 2 cups flour and 2/3 cups water (approx) and a tiny bit of oil (20ml or so), and obv some dry yeast, salt and sugar to help rising.
I first made just a tad bigger dough batch and that took over an hour to bake. I may also not have made it sit so wide and thin the first time ie the loaf was more round and thus took more time. Turning around can speed things up too. Am still in the beginning of this experimentation!